Candlestick Diaper Cakes
Candlestick diaper cakes are a very popular method to use to create your one of a kind gift.
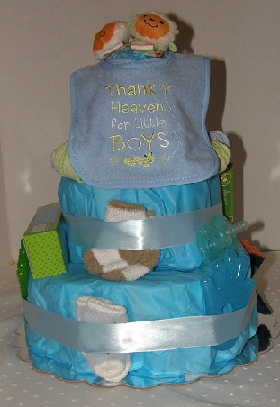
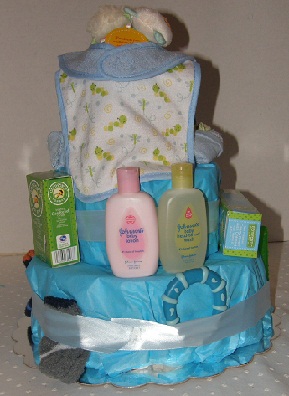
Here I'll walk you through my very own "Little Boy Blue" themed diaper cake that I "baked" recently for a baby shower.
In general, once you have assembled your basic recipe ingredients, it will take you about 1- 11/2 hours to "bake" your candlestick diaper cake.
For my "Little Boy Blue" nursery rhyme theme, I chose to do a three layer candlestick diaper cake.
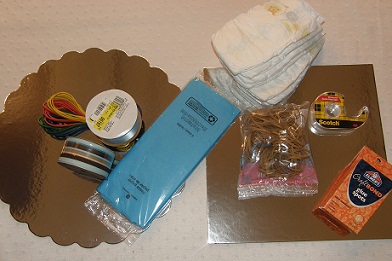
Diaper cake ingredients:
- 50 - size 2 disposable diapers
- 1 package of assorted small to medium sized rubber bands
- 2 large rubber bands
- Double back tape and glue dots
- 1 14" round scalloped cardboard cake plate
- 1 package of blue tissue paper
- 1 roll of 11/2" wide baby blue ribbon
- 2 infant sized bibs
- 2 pacifers
- 4 pairs of infant socks
- 3 teething toys
- 1 tube of diaper rash medicine
- 1 bottle of infant gas reliever
- 4 infant washcloths
- 1 small bottle of baby lotion
- 1 small bottle of baby shampoo
- 1 pair of wrist rattles
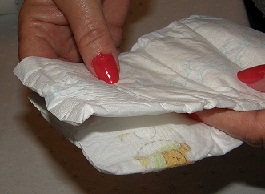
To begin, roll a diaper tightly, by starting at the open end and rolling inward to the folded end.
Once rolled, secure the diaper with a rubber band.
Repeat for all your diapers.
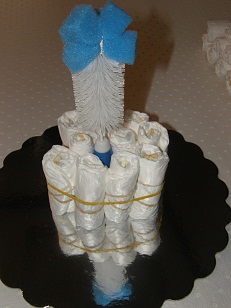
Place the item you have chosen for your center core for the cake in the middle of your cake base.
In the case of my Little Boy Blue cake, I used a blue bottle brush that came with it's own suction cup stand.
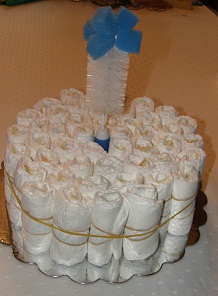
Place a large rubber band around the center core item and begin to fill the layer in by placing rolls of diapers within the rubber band arund the core.
Continue building out the layer until you have covered the base as wide as you want your layer.
 |
 |
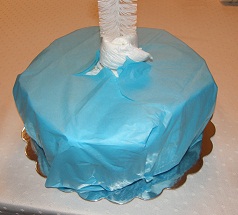
For my "Little Boy Blue" themed diaper cake, I wanted an "iced" look for a nice finished appearance.
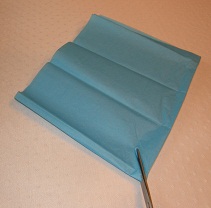
I did this by layering 2 pieces of blue tissue paper and folding in half and then half again.
I cut a slit in the folded corner about 2'' long and then unfolded the sheets.
I slipped the opening over the top of the bottle brush and down onto the first layer.
I trimmed off the excess paper, then smoothed the paper over the diapers and tucked the ends underneath the layer.
 |
 |
Now build the second layer on top of the first layer again by slipping a large rubber band over the core and filling in with the rolled diapers.
This layer should be smaller than the base, how much smaller is up to you.
Then build the third layer, smaller yet again, on top of the finished second layer.
I also used the blue tissue paper to "ice" the second and third layers of my diaper cake.
Now comes the real fun! This is where your creative juices can really get to flowing as you decorate your cake.
If you didn't "ice" your cake, you will definitely want to use a wide ribbon around each layer to cover the rubber bands.
In this cake, even though it was "iced", I still chose to wrap a blue ribbon around each layer.
Ribbons work great to attach your decorative items to the cake.
Use the double back tape or glue dots to secure your ribbons and decorative items in place.
I added all the items I had selected by tucking into the ribbons, taping to the spaces left along the edge of the layers and on the top of the cake.
Share your creative diaper cake recipe with us!
Have you created your own unique and delectable diaper cake recipe?
Share your wonderful creation with the us and get even more of those well deserved "ooohhh's" and "aaahhhh's".
Not only will you be sharing your creative genius with lots of women in the world, you will automatically be entered in our Diaper Cake of the Month contest.
Diaper Cakes - the most useful and creative new baby gift!
Diaper Cake Ingredients - basics needed to "bake" your cake!
Square Diaper Cakes - easy as pie to create this wonderful cake!
Wrapped Diaper Cakes - simple as it sounds!
Nursery Rhyme Diaper Cakes - nursery rhymes are perfect themes!
Diaper Cake of the Month - a fun creativity contest!
Five Little Monkeys Diaper Cake - boys and monkeys the perfect pair
Little Boy Blue Diaper Cake - blue is perfect for baby boys!
The Owl & The Pussycat Diaper Cake - adorable for little girls
What Are Little Boys Made Of - dogs and snails and puppy dog tails
Wise Old Owl Diaper Cake - adorable for a baby girl!
Like us on Facebook! Tell your friends about us!
Made for Cuddles
Shop for Handcrafted Baby Gifts
Diaper Cake of the Month Contest
Do not miss the new stuff!
Sign up for our newsletter!
